Sunday, June 26, 2011

Motorcycle?

Sweet ride . . . Triumph Speed Triple

I was walking down the street one day on my way to the EAA 143 Aeronca Glider Project when I saw this urban sports toy.  Since I had my camera, why not take a picture.  I love bikes.  Ever since I was a teen, I either had one, or wanted one.  I finally bought one when I was 15 years old, which by the way was just about the time I started flying airplanes in the Civil Air Patrol.  Anyhow, one day I was in a motorcycle store buying some parts for my Honda when I just happened to look up.  Guess what I saw.  Yep, an airplane was hanging from the ceiling.  It was an ultralight.  It was then that the light bulb went off, people that like motorcycles like airplanes.  I have notice this phenomena many times over the years, and this was no exception. Now that you know about this, you will also notice the correlation.   Oh, I forgot to mention that the Triumph was sitting in front of the EAA143 chapter meeting building.  So, when I went inside I started asking each person.  Is that your motorcycle?  John said no.  Leo said no.  Dick said no.  Joe said no.  Hey, there is a new guy here, must be his.


Paul Straney . . . the new guy.

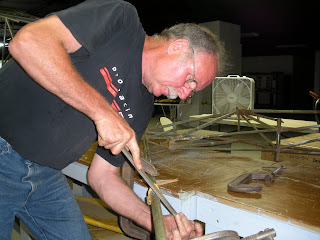
The new guy, Paul Straney, is the biker.  Here is a picture of him working on the tail of the glider.  He is filing the rough spots that were left as a result of cutting to enlarge the vertical tail.  His background includes working for the National Guard as an Airframe Technician, A.K.A. an airplane body and fender guy.  Welcome aboard Paul!


Lunch is served every Saturday at 12:30pm

Joe cooks every week.  This week he served pulled pork and potato salad.  Joe also cooks for the monthly EAA 143 meeting which occurs the fourth Tuesday (except December).  Maybe you have heard, but if you haven't, Joe is a great cook.  It's just one more reason to come out and help :-)

Now we have one more helper, and the glider project is moving forward.  In the comming weeks I will update the progress on the wing ribs and fuselage modifications.  Stay tuned.

Sunday, June 19, 2011

Hi, just a short post today (it's Fathers Day and I have a full schedule of fun activities!)


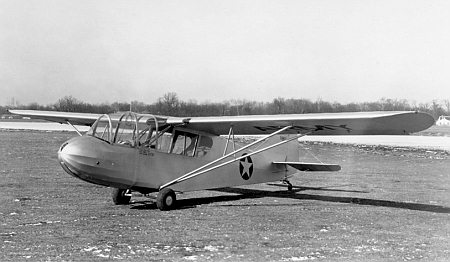
Doccumentation for the TG-5

Every design starts with drawings.  Then it is built.  Then it is tested.  Then it is used.  So, drawings are the starting point.  We are fortunate to have a very good set of documentation for this project.  Unfortunately, it needed to be put in the proper order.  Imagine a shoe box of tax receipts that needs to be categorized and filed in proper order.  It requires lots of tedious work, and it MUST be done.  So, who is going to do it?


Documentation engineer.

The gentleman on the right, Mort Sacks, is the documentation engineer for the TG-5 project.  He is talking to the project engineer, Joe Miller.  Yes, he is willing, and has the patience to get-r-done  :-)
Mort is recuperating from knee replacement (notice the two canes), but still comes out and helps in an area that is so very critical . . . Thanks Mort!

Anyhow, here is the plug.  We need your help.  Whatever you can do, or want to do, come out and we will find something that you can do.  We need all kinds of help.  Some of you will be teachers that show others how to do a task, some of you will learn from the teachers and do a task.  This is a wonderful place to learn.  If you have any interested in aviation, this is the place to learn.  You are very welcome, and we look forward to meeting you!

P.S. We have an immediate need for a welder that can weld thin wall tubing (used in the fuselage).  If you have a background in this, please . . . contact us.

Sunday, June 12, 2011

Wing Ribs

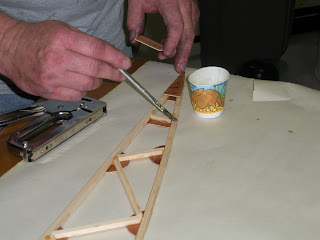
These are the first two ribs.

So, how do you take a pile of wood, and turn it into a set of finely crafted, and aerodynamically precise, wing ribs?  The answer to this is answered by the two gentlemen below.

Leo Drescher (left) and John Kraft (right).

Leo and John were making the second and third ribs when I stopped in.  They had finished the cutting and fitting (sanding) process and were just starting the gluing process.  They were using a two part epoxy.  So, I didn't want to slow them since they had a limited amount of time to do the gluing once the epoxy was mixed.  I managed to stay out of their way while they did their magic.


Jig with parts in place.

The jig is important.  Hmm . . . let me rephrase that, the jig is VERY IMPORTANT ! ! !
It provides a consistent airfoil across the full length of the wing.  This jig was made from a perfectly flat piece of wood.  Then the full size drawing of the rib was glued to it.  Next, small wood blocks were screwed in place to hold the pieces in the EXACT position while being fitted, glued, and stapled.


This is a good view of the blocks of wood screwed into the jig.

I have to pause here and confess that my mouth is drooling.  I have done this soooo many times before with model airplanes.  If I didn't know the scale was so large, I would think it was a rib for a remote control airplane with a Cox .049 engine.  Those are great memories.

Leo and John, you guys get to have all the fun.  As for me, I just take pictures of you having fun  :-)


Brushing on epoxy.

Notice that the curved line just below the end of the glue brush.  That marks the location of the plywood gusset that will be attached.  You will see that Leo stopped the brush here, because he didn't want any glue past this point (extra weight).

John is applying the gusset.

Leo is stapling the gusset.

Initially, the staples were to big.  So, thinner staples were purchased.  Now, they don't split the .25" x .25" wood.

Note the extra piece of wood John is holding.

Sometimes an extra piece of wood is helpful to get the edge of the gusset lined up with the edge of the cap strip.


Rib removed from jig and placed on paper.

Oops, upside down, or sideways?  Sorry . . . .  The parts are now locked in place and even though the epoxy has not set, it can be removed and flipped over.


The process of gluing is repeated on the other side.

Add a gusset.


Add a couple of staples.

I noticed that two guys make a good team on rib building.  

Two hands would not be enough, and I suspect six hands would be too many.


Cap strip forming tool.

Leo made this forming tool.  It is cut to match the curve of the top cap strip where it meets the nose piece.  The top cap strips are put in hot water for an hour, then put in this tool, and clamped.  After a couple of days the clamps are removed, and voila, very little spring back.  Neat, huh.

I should point out that although it is not immediately obvious, this tool will hold lots of .25" cap strips.

Here is a question.  I wonder how long it took Leo to cut this on the band saw?  A long time?  Any guesses?

Sunday, June 5, 2011

Skin and bones . . . without the skin.

Don't squint, you might miss it.  The fuselage tubing is visible, but without the skin it is easy to miss.  Fortunately, it survived the trip from Texas to Baltimore with out any problems (Thanks to Ulf Grabowski).


Notice the different conditions of the metal.

Some of the fuselage tubing is weathered, some has old paint, and some has new paint.  It will have to be totally stripped and repainted.


Tail Modification in progress.

Joe Miller is cutting the curved front from the vertical stabilizer.  It will be replaced with a larger and rectangular section. 


Tubing, or not tubing?
That is the question.

Dick Weger is making a list of the tubing needed for the fuselage modification for the third person.  This involves taking the original drawings and adding the lengths of each tube (of the same size).  Once done, the necessary tube can be purchased, cut, welded, and painted.

Just incase you ever have to do this, be careful.  Dick pointed out that even though the diameters are equal, sometimes the wall thickness is different.  

This modification will require that the engine be removed, the fuselage extended and a door added.  A third set of controls will be added.  Yes, I said three sets of controls.  Now, here is a dandy trivia question.  With three sets of controls, the instructor gets one set, and the two students get the others.  So, which set does the instructor use, front, middle, or rear?